


lare2
-
Posts
1,017 -
Joined
-
Last visited
Content Type
Profiles
Forums
Gallery
Store
Downloads
Blogs
Events
Blog Comments posted by lare2
-
-

Quick update. Don't think I'll be doing anymore painting this week so currently here. Chuffed with how the glazing worked out. Will be using this white with the other models moving forward.


-
 1
1
-
-
1 hour ago, NauticalSoup said:
I quite like what you've done with the banner!
Cheers. I deliberated what to do with it for a long time and looked at a lot of pics.
-
Bit more tonight. Steel highlighted with Leadbelcher and vallejo Chrome. Parchment washed in Seraphon and then highlighted with zandri, 1/1 Zandri/screaming skull, screaming skull. Grass and moss based with death guard green, washed with athonian camoshade, and then highlighted with death guard green and ogryn camo. The flower is a 1/1 base of ogryn camo and dorn with highlights of dorn. Skin has been highlighted with Rakarth and then a 1/1 Rakarth/pallid witch flesh. Bone is Rakarth base with a Seraphon wash before being highlighted with Ushabti. Don't think there was any more.
Need to hit that cloak tomorrow... not looking forward to that. Hate doing cloaks as I never get them looking right.


-
1
-
-
5 hours ago, Neil Arthur Hotep said:
But if you really get into drybrushing and learn to do it right (like Byron from Artis Opus on youtube, for example), it works well even in those contexts.
Love this guys videos. His drybrushing is another level. Would love his specialist brushes (series d, I think they're called) but there's no way I could justify the price.
-
1
-
-
Oh, there's also Reikland on the flesh. The wood is dryad bark drybrushed with sylvaneth bark and then washed in agrax.
Say what you will about drybrushing, I feel it looks far more natural on organic objects, like the wings and wood.
-
Apologies for the copious amount of baby toys in the background but feel like I'm starting to really get somewhere now.
Some new things added: hair is grey seer base with Apothecary white and then drybrushed with praxeti. The wings are grey seer base. The top section is then layered with the fang. The second section is then russ grey. The 3rd is left grey seer. All are then washed with Drakenhof nightshade. The top 2 layers are then drybrushed with russ grey before again being drybrushed with stormfang. The white here is heavy drybrushed with longbeard grey before a lighter praxeti drybrush was applied. All of my Aetherwing are done like this as well.
Because I kept the wings separate, I wanted to layer the gold before attaching them as felt it would be awkward. For this, the gold was washed with agrax, highlighted with retributor and then liberator gold. There's a nuln oil wash on the leadbelcher and a carroburg wash on the Mephiston. Think that's it for now though.

-
1
-
-
Had a bit of a medical emergency and had to sack in the tourney. Still, managed to get the army tabletop except for Yndrasta. Once she's up and running I'll get some pics up.
-
Turned reply into post.
-
Nope, I'm full of it. It's Akhelian Green for the blue. Will edit the above.
-
On 1/20/2022 at 3:33 PM, Wordy9th said:
Nice work! What’s the blue colour you’ve gone with?
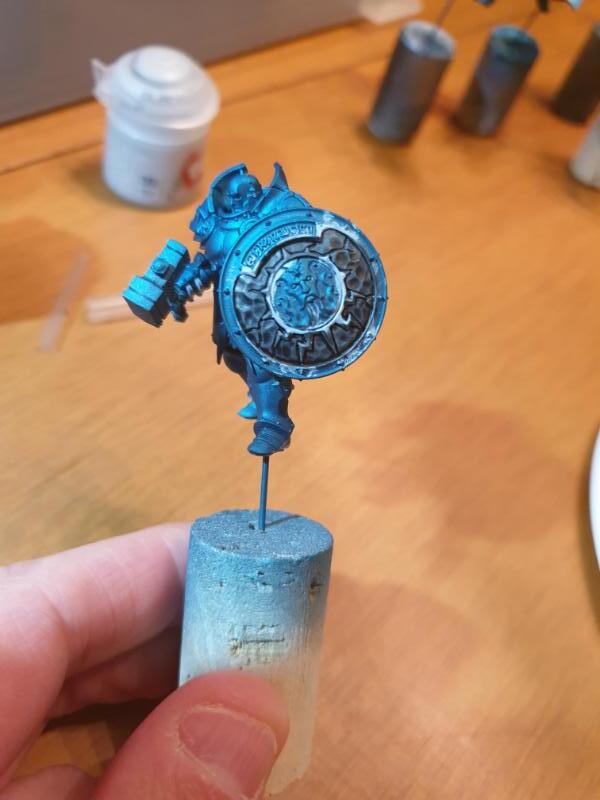
Hey, sorry for the delay. I never seem to get notifications for blog posts. The blue is Akhelian contrast. It's on top of leadbelcher with a zenithal highlight of a vallejo metal... I forget which one. Will check now and get back to you.
Edit: vallejo model air chrome
-
I'm always surprised by what a lick of wash will do. There's carroburg crimson on the brown, followed by goregrunta fur. Agrax is also on the gold.


-
1
-
 1
1
-
-
Forgot to mention, the keen eyed amongst you will notice I've changed the leather from red to baneblade brown. I was never sold on the previous red and I watched a tutorial from the Brush and Boltgun (love this channel) on red leather. Thought it looked mint so gonna follow his advice.
-
On 1/1/2022 at 7:33 PM, KingBrodd said:
Colours are absolutely popping mate I love them!!
Thanks! It's been a while since I've updated. Christmas knocked the gaming wind out of me but got back to it this week. Just about to start on the last base colour - leadbelcher. Will update with pics when I've a few done.
-
1
-
-
Just a quick update, managed to do all hair and the bases on animals last night. I don't quite believe it but I'm actually on the metals now. Once the metals are done, that't it for bases - whoop whoop! I've spent the better part of this year uhming and ahing what the armour metal would be: gold or steel. I'm gonna go gold as the weapons and chain mail-esque armour will be steel. Just gonna go for basic SCE colours for this, i.e. Retributor Armour and Liberator Gold.
-
1
-
-
18 hours ago, Neil Arthur Hotep said:
Your Stormcast are really starting to take shape! It's always nice to see your progress.
Thanks - it's much appreciated. Worked on them a bit more last night as well so getting a good layer of Zandri down on the parchment.
18 hours ago, Neil Arthur Hotep said:Number one is to just bite the bullet and paint the eyes on every miniature. You never get better at stuff you don't practice. It was a pain at first, but I definitely started to notice some improvement with time. Number two was to get the order of operations right. I had always tried to do the eyes last, but that's hard because at that point you are likely ruining the skin you have already painted. Now, I usually do the basic skin colour first, then a dark wash, and then I start with the eyes. That makes it way easier in my opinion, because you don't have to worry about messing anything up. I also use the method of putting down a thin off-white line in the eye area, then putting in the pupil and finally cleaning everything up with skin colour, so there is usually a good bit of white/black outside the lines.
Thanks for the pointers. I really wanted to start giving more focus to faces when I started but with doing everything at once, I don't think I could face (no pun intended) it. I also think I'd prefer to keep the head separate from the bodies to do them. I'm pretty certain that following this I'm just going to go back to a unit at a time and at that point I'm gonna keep the heads separate. You're right though - practise makes perfect and the only way to improve is by actually doing them.
18 hours ago, Neil Arthur Hotep said:It's way easier to get right and your models won't end up cross eyed. Oryou can just, you know, learn to love the mysterious shadow over the eye area you get from a good dark wash and stop worrying about it. It's not like you can tell from a few feet away anyway.
And it looks awesome! This is one of the (many!) problems I have painting though - I'd know about it! I watch tutorials and whatnot and I'm always envious of their speed painting and how they skip corners (not painting underneath, for example) but then it comes to me sitting at my table... and I just can't do it for some reason!
-
1
-
-
Just a quick update. Took the week off painting but got back to it tonight. Almost finished the white - 5 more sequitors to go. Decided to use my hobby time this week to build new models. I couldn't resist the new stuff and bought an obscene amount of Annihilators. Played then Thursday night. Absolute nukes.
-
On 10/26/2021 at 2:12 PM, JackStreicher said:
Very nice!
I've almost Air-Brushed my entire Collection (ordinary turquiose) by now. Yet I respite from putting on the other base colors (it's the part I hate the most XD)
I am keen to see the first models done!
Did you already finish a test model?
Thanks!
It's a challenge alright, especially when working with (now) over 2kpts worth of models!
I did do a tester but it was very rough and ready and not complete. I mainly did it to test certain things, like how contrast over metal would look when using enamels. Pic below for you though. It was my first time using a few of the techniques applied so please be gentle! Ha ha!

-
2
-
-
On 10/17/2021 at 9:29 PM, stato said:
Good work, keep at it. Everyone thinks stormcast are easy to paint (spray gold, done) but these newer models have loads of details to paint. Looking good, great dedication!
Thanks - means a lot. The Thunderstrike stuff actually caught me out. I thought, once I'd done the red on the Vanguard and Sequitors, that the new stuff would fly over. How wrong I was.
-
 1
1
-
-
Right, the red is finished. There's been thrills, there's been spills... there's been every known disease in the lare2 household since I started painting red. Seriously though, the pandemic really made all our immunities weaker than a baby kitten. Anyway, onwards and upwards. Will be starting the white sections this week. The main parts will be the shoulder pads and the inside of all cloaks.
-
Just a quick update to say that I've spent this week still plodding on with red. I've 2 coats on the Sequitors and Longstrike. Just working on getting the first coat on my Thunderstrike stuff. Been taking me on average about 15 minutes per model to get a coat down. Have 5 Vindictors, 3 Praetor, 3 Annihilators, LA, LI, LR, and Yndrasta to go - 15 models. 15 x15 mins... looking at 3 hours 45 minutes to get the coat down. That would be Monday and a bit of Tuesday's painting sessions gone. Then for the next coat, there'd be 20 models, which would be 5 hours more work. Envisage finishing both layers off then about a week on Monday.
-
So much information! What a day. To summarise for here though, the list I was working on is now 2190. Far too high. Gonna cut 3 Longstrike, bringing it down to 1950. On the plus side, that's 3 less models to paint to get a legal army on the table. Celestial Vindicators' new rules though... they really aren't the best!
-
And that's all the black underarmour complete - whoop whoop!
Just for the sake of another pic, here's my Annihilator. Took a punt, using contrast black for the shield. As a base, I'm chuffed with how it came out.
Won't be painting again until next Monday now. Next up will be more back. This time Corvus and I'll be getting the base down on the backs of the shields and the Longstrike guns... off the top of my head I think that's about it.
Actually got a game tomorrow night so pumped for that. See how I do against giants!
-
On 9/7/2021 at 9:47 AM, Neil Arthur Hotep said:
I think your pictures look pretty good already, but in any case, here's what has helped me take better photos with my phone camera:
- Take a picture from further away and then crop it. That helps getting your miniature in to focus properly. Modern phone cameras have high enough resolutions that you won't end up with tiny ant-sized pictures, anyway.
- Make sure you have natural light and a background for best results. In practice, that just means moving next to a window and holding up a piece of paper in the background.
- After taking your picture, run it through automatic colour correction. You probably already have a program that can do this (as well as crop pictures) on your phone. Additionally increasing the "pop" slider makes your models even more readable by increasing the contrast between separate parts of the model.
Outstanding advice. Very much appreciated. I've only just seen this but will definitely be trying out these tips when I next take pics.
-
1
-
Whichever red leather I choose, it'll work as well for the strap behind the shield. Thinking about how to paint these has been on my mind. In the planning stage of this project I, for some unknown reason, decided to completely ignore the backside of the shields. Think I've settled on just black for the back of the shield, red leather for the strap, and then silver for the bit connecting the strap to the shield. Now I'm looking at those bolts... Those bolts were on my mind this morning as they're also on the armour. Did a quick check of GW's site to see what they do with them. For their Hammers they just leave them the same colour as the armour but the ones behind the shield are silver. Think I'll just do the same.


Lord-Relictor
in We fight! We kill! We win!
A blog by lare2 in General
Posted
Calling the guy done for now. There's a few things I've still got in mind for him (e.g. the hourglass) but it all involves new techniques, which I'll try probably on some Vindictors. I've plenty of those spare in case it goes wrong. Gonna aim to get the Lord Imperatant to this standard next.